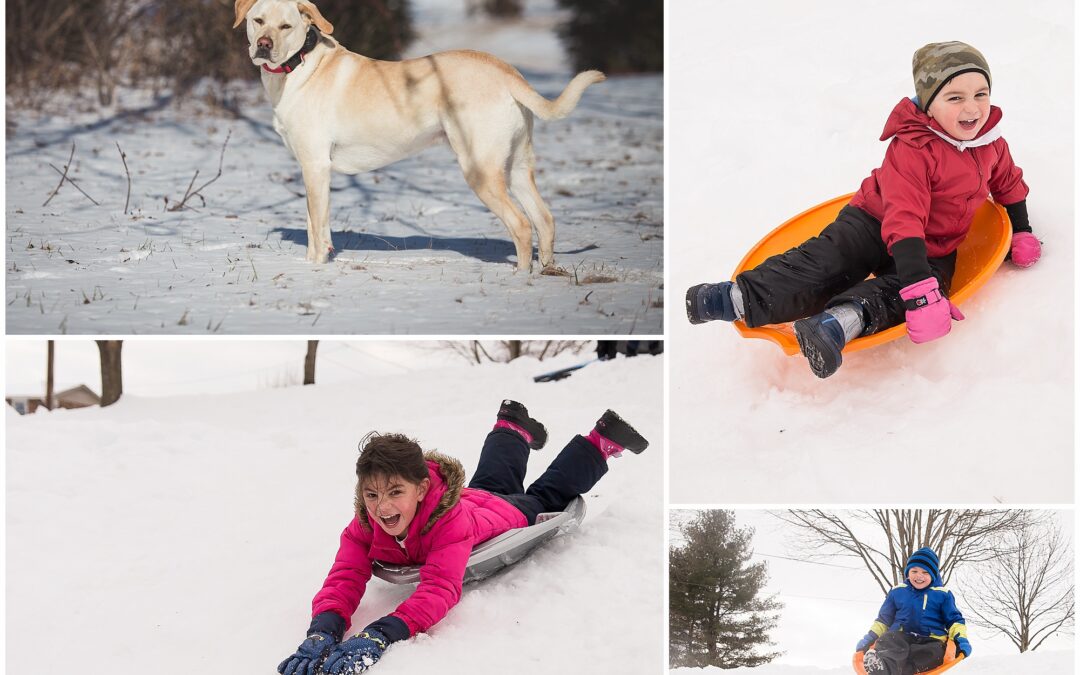
Snow photos are so much fun, but they can be really hard to photograph. It’s supposed to be white, right?! If you get it too bright, you lose the detail in the snow. If you get it too dark, your snow looks gray. It’s certainly a balance game. There are many techniques that the pros use to get good snow photos, but I want to keep it simple so that you can you see an immediate improvement even with your cell phone. I can’t wait to see your results using these 4 tips for better photos in the snow.

Our cameras are programmed to see the world as gray and they will automatically read the scene to balance all the light. When that bright white snow is in front of us, your camera gets a little confused and thinks that it is way too bright and will underexpose the scene. The camera wants to achieve its goal of that 18% gray scene.
We can outsmart our camera.
If you are shooting with your cell phone, that’s totally fine. You’ve got one easy adjustment to make for better photos in the snow. Just look for your HDR button and switch that little thing on. That will make your camera take and combine three photos. It will take a darker, normal, and brighter one. It combines the three of them to create a correctly exposed image. If your image still seems dark or gray, move the exposure up to brighten the image.
If you are using your fancy DSLR or even a nice point and shoot camera, try out these 4 tips for better photos in the snow.
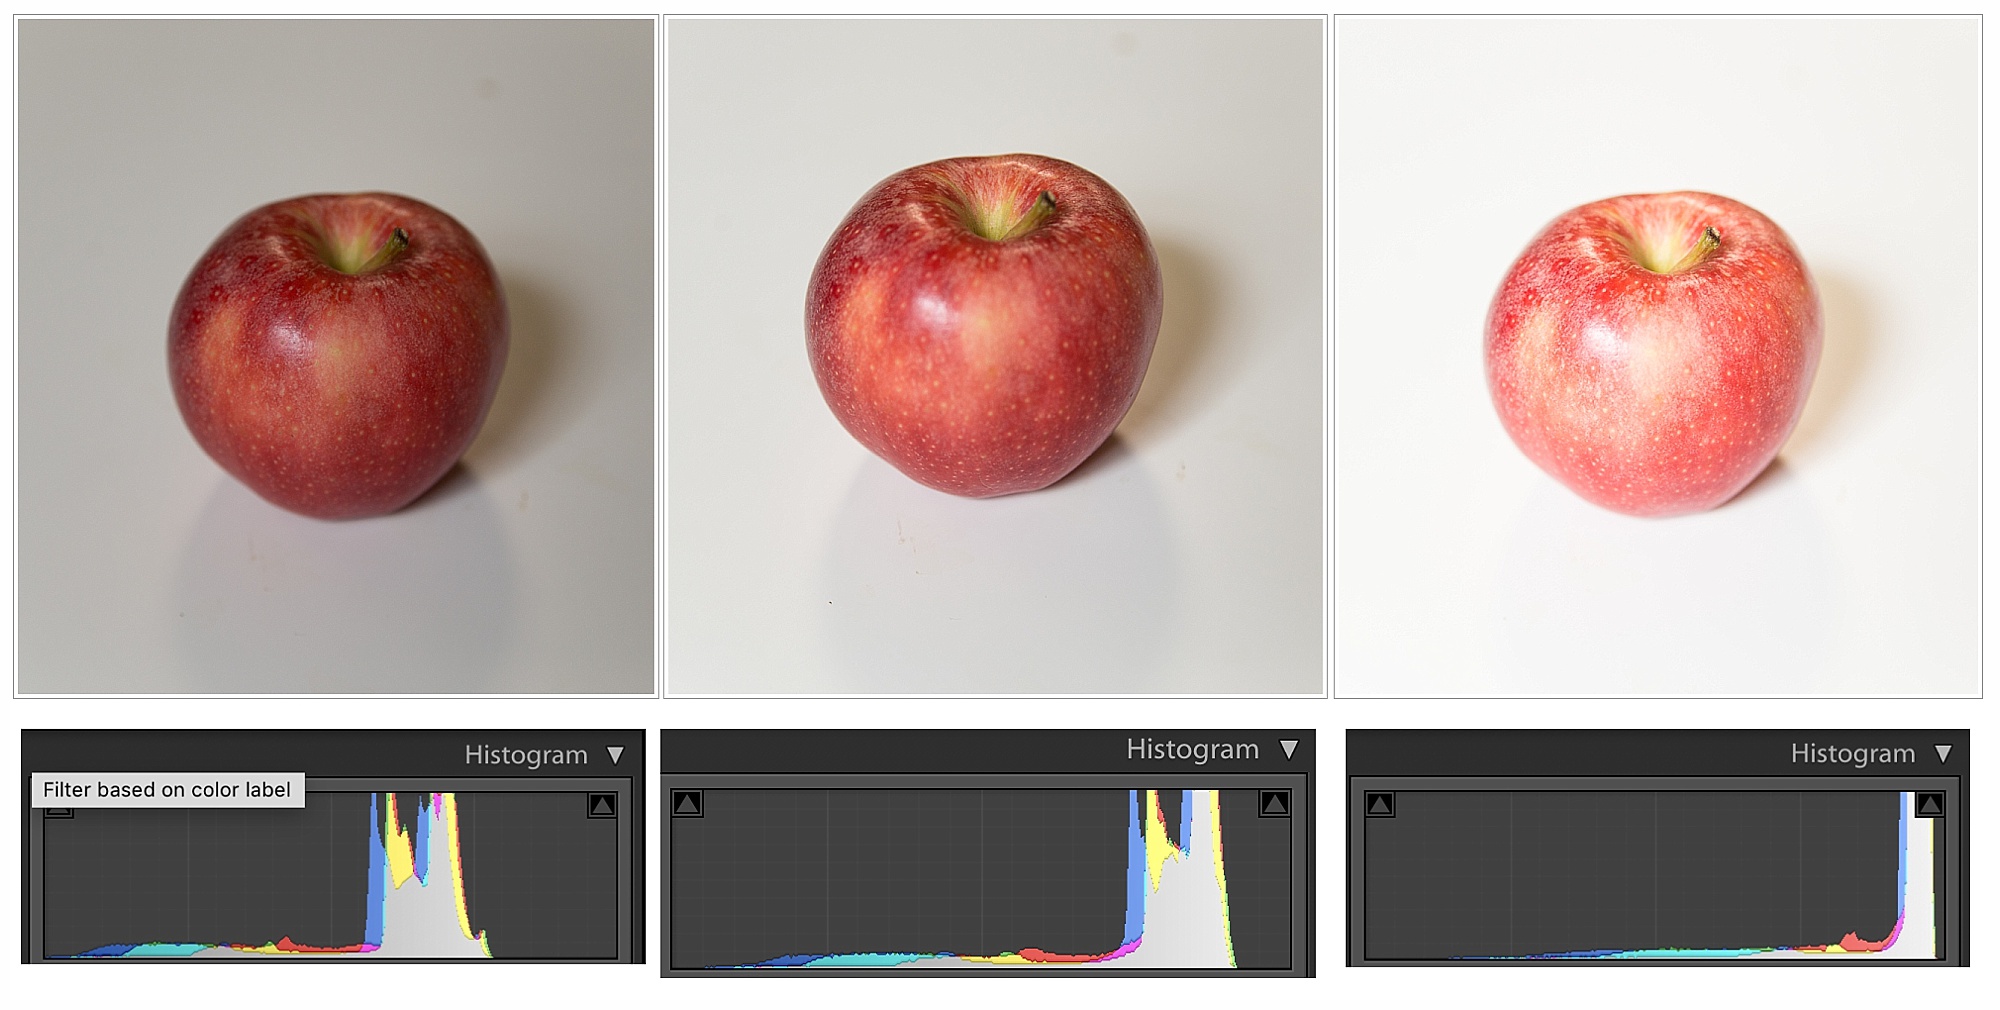
{Note if you want to practice, but don’t have snow or don’t like being cold, grab a white piece of paper or any white surface and get near a window for natural light. You can practice the same settings. That’s exactly what I did for this example.}
1. Overexpose Your Photo
You need to overexpose the scene. This might be hard if you’re still shooting on that little green button, but here is one simple trick. Switch to Program mode (P) and use Exposure Compensation (EC) because it is the easiest way to get your camera to overexpose as it doesn’t require all the knowledge about aperture and shutter speed.
Just make sure to look for the button that resembles this one on your camera or just google “Where is the exposure compensation for my {insert camera name}?” Once you figure that out and how to change it, just play around. I suggest starting with +1 and see how that looks. If you need more light to make the snow-white, go up to as much as +2. Take a few test shots and see what works best for you.
If you are shooting in Aperture Priority Mode to achieve those blurry backgrounds, you can also use exposure compensation to make sure you get white snow.

2. Use Your Histogram
I know, I know. That’s a big scary thing and I won’t go into much detail at all. Basically, if your histogram falls all the way over to the right and spikes up the right side, you’ve overexposed your scene and will lose details in your photo. And if there’s one thing that is hard to fix in editing, it’s blown-out highlights. In a white or snowy scene, you want your histogram to look more like the middle one below.
Your histogram is a handy tool in times like these. So play with the setting suggestions from tip one until you achieve a better histogram reading.
3. Adjust Your White Balance
Snow also tends to read on our camera a little bluer in color and if you’re photographing people, no one likes to be blue. One thing that you can do to make your photos look better straight out of the camera is to adjust your white balance. You can choose the “cloudy day” setting on your camera to give skin tones a little better color.

4. Adjust Your ISO
If you’re new to this and always shoot with the little green auto button, you might also want to make sure you know how to change your ISO to a higher number. If your subject is moving and is blurry, all you need to do is take your ISO number up to 200 or 400 + and that should give you a little more wiggle room. Don’t know how to change ISO? Just google “How to change the ISO for my {insert camera model}.” You should find an easy video telling you how to do it.
Now it’s time to practice.
I’d love to see what you come up with whether is snow photos or just an apple on a white table. Make sure you’re a member of the Facebook group so that you can share and get feedback from others hoping to achieve the same awesomeness.
DON’T FORGET to put your exposure compensation back to 0 because if you forget then all your other photos will be overexposed. Yikes! Also, remember to set your white balance back to auto. If you’re like me and have a bad memory, you’ll never remember what you changed and then wonder why all your photos are too bright and oddly yellow. HA HA!
Love getting photo tips? Make sure to hop on my email list for budding photographers:
Recent Comments